Table of Contents
Setting Up Eclipse Debugging Environment for ImageJ Plugin Development
Eclipse IDE is an extremely useful IDE but very complicated on first look (and on second, third… for me). Setting environment is important for efficient development but this preparation actually is not so straight forward. Some step-by-step instructions are available here or here.
Following these instructions does enable you to develop nicely. With these instructions, you could probably understand how to set classpath and how to link other projects as reference.
For myself, the most difficult configuration has been to set debug and run environment. After some experiences, I found that setting Run/Debug environment is very flexible and there could be many ways to configure: while flexibility is great, too flexible also means that it tends to cause troubles.
I expose one of my debug/run setting of ImageJ plugin development in Eclipse. Note that this is not the only way, and also keep in mind that the most important setting is “Arguments”. I have made special emphasis on this configuration.
Configuration below assumes that the compiled plugin (e.g. jar file) is already copied to the plugin folder of ImageJ or Fiji plugin folder. Automatic copying of compiled jar file to the plugin folder is normally done with Ant, the build.xml file. I do not explain about this here, so please refer to the fore mentioned tutorial links.
Panels shown below are from Eclipse “Helios”. In other versions older or newer, they look different, but contextual meaning of important field values should be common to all.
Main tab
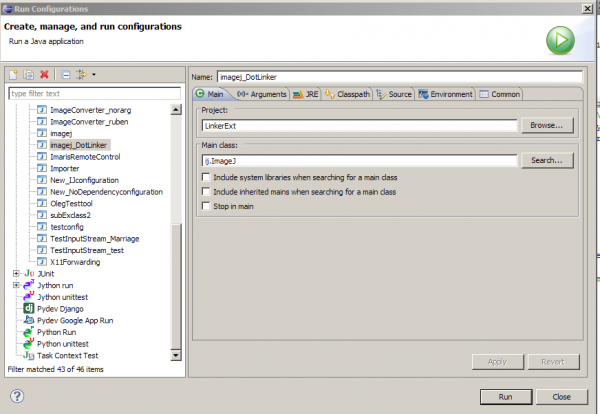
Run/Debug configuration is done via [Run → Run Configurations…] from the menu. You will see a panel, with left column listing your Run setups and in the right several tabbed panels for setting parameters. Here is the “Main” tab.
In Project field, select the ImageJ plugin project that you want to debug or run. In Main class field, set ij.ImageJ as the main class. This causes Run to start up ImageJ. If you type fiji.Main, then Fiji will start up. For these classes to be recognizable by Eclipse, you could set your working directory to ImageJ folder (see the next tab “Arguments” explanation) or Fiji folder, or set class path explicitly to corresponding jar file. In case of ImageJ alone, ij.jar is the target.
There are three check boxes below these fields. I have never checked on up until now. If you have problem in grabbing Fiji main class, checking both “Include…” boxes ON might help.
Arguments tab
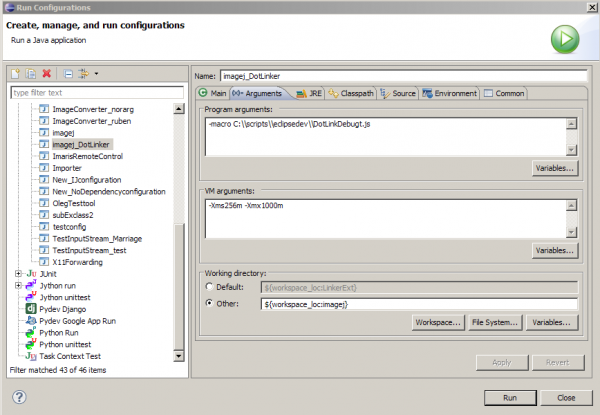
Arguments tab sets options to be sent to Java virtual machine (VM arguments field) and optional arguments passed to ImageJ or Fiji (Program arguments field). Working directory sets the base directory where the Run/Debug will consider as root.
VM Arguments
In the above example, I set “-Xms256m -Xmx1000m”. These are options for the Java virtual machine. This is same as the command line options for Java, same as doing
java -Xms256m -Xmx1000m
…which sets the memory minimum (256M bytes) and the maximum (1Gbytes). There are may options available with java. Any of them could go into the VM arguments fields. You could check all these options by typing “java -help” in your terminal. There is also description available in the following Oracle page.
Some options you could try out when you do not see any plugins listed in the [Plugins >] (though you have them in the plugins folder) is -D.plugins.dir option. VM field could be something like
-Xms256m -Xmx1000m -Dplugins.dir=C:\\ImageJ\\
Program Arguments
Options added to this field will be passed to ImageJ or Fiji.
-macro C:\\scripts\\DotLinkDebugt.js
In the above case, -macro option with file path passed to ImageJ will run the script automatically. By adding this option, I automatized the processing after launching ImageJ, to open an image stack, import data into results table and run plugin (the plugin I am debugging or test running). This is same as executing the following in command line
java -jar ij.jar -macro C:\\scripts\\DotLinkDebugt.js
Just as an example, below is the script.
<sxh javascript>
dotlinker Debugger
to be called from Eclipse
20110831
IJ.open(“C:\\dropbox\\My Dropbox\\tenFrameResults.csv”);
imp = IJ.openImage(“C:\\dropbox\\My Dropbox\\bin10frames1_10.tif”);
imp.show();
IJ.run(imp, “Dot_Linker”, “”)
</sxh>
Options that could be passed to ImageJ are listed in the following page:
* ImageJ javadoc ij.ImageJ
Working Directory
Normally, this could be set to the default location, the directory where the project files are. This directory is set by using variable workspace_loc, which contains OS absolute path to the workspace where you are now working with. Then ${workspace_loc:<projectname>} returns path to the pluging project folder.
I set this folder to ${workspace_loc:imagej}, a path to the imagej source and compiled files of imagej. I have it in the same workspace as a project (which is cloned via git). By having working directory to this imagej folder, pluigns will be automatically recognized. Alternative of doing so is to set the -Dplugin.dir as explained above.
===== JRE tab =====
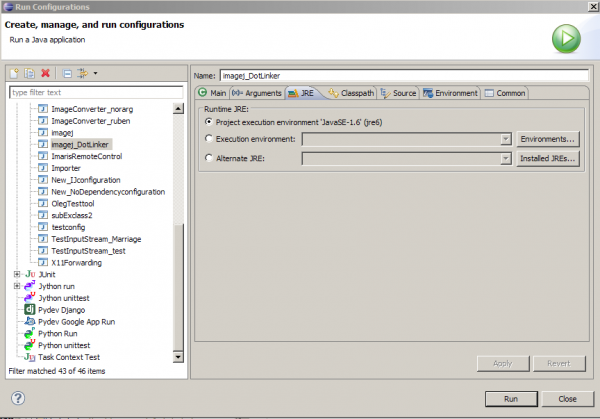
You could choose JRE with different versions in this tab. I normally do not touch this, but if there is any indication that JRE version is causing error, you could test them around by selecting “Alternate JRE” and intentionally set VM to a specific JRE.
[ ]
===== Classpath tab =====
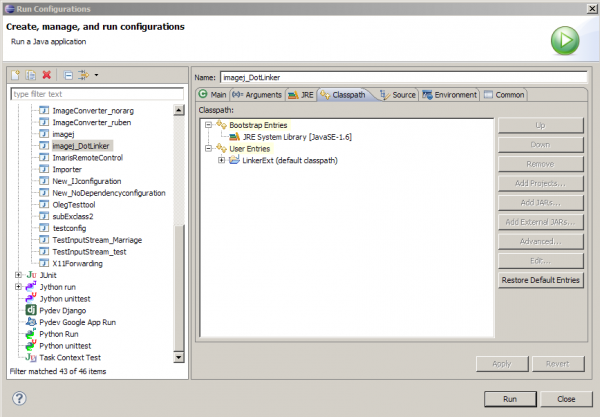
This sets the java -classpath (or -cp) options. External libraries you set in the project properties “Java Build Path - libraries” will be added to here and in the source tab (see below).
[
 ]
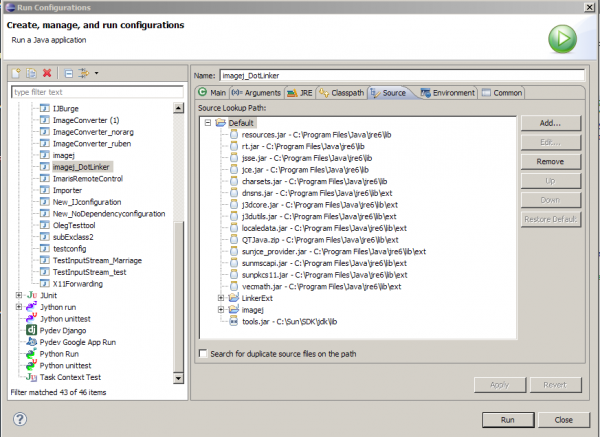
===== Source tab =====
[
 ]
===== Other tabs =====
There are two more tabs, “Environment” and “Common” tabs. Up to now I have not been advanced enough to touch the values in these tabs, and leaving them as it is has caused no problem.
